team negative1 : Reel Reviews - Film Print Analysis
Last Update : 2020.05.20Talking Bay 94's interview with Paul Hirsch (editor of 'Star Wars') Illustrated
|
Explanation : Talking Bay 94 is a podcast created by Brandon Wainerdi in which he interviews the cast, crew and creators from a galaxy far, far away. In Episode 37, Brandon interviewed one of the editors of 'Star Wars', Paul Hirsch, to talk about his book A Long Time Ago in a Cutting Room Far, Far Away (My Fifty Years Editing Hollywood Hits - Star Wars, Carrie, Ferris Bueller's Day Off, Mission : Impossible, and More) and one of the segments was relevant to the 'Reel Review' concept so we transcribed this piece of the interview and added illustrations to help explain Hirsch's story and dig into the types of splices observed in Star Wars film prints.
Start the podcast from Talkingbay94.comFast forward to timecode : ~00:19:55 [Length of segment = 6 minutes ]Brandon Wainerdi : With Star Wars specifically and then moving into Empire there was you now again the special effects work and the story being told was so radically different than, you know, movies that had come before. What were your first impressions? You were one of the first people to ever see completed footage of Star Wars. How were you coming to realize that through the work you were doing? Paul Hirsch : I wanted to watch the reels when I started and George said no no no don't do that. Nothing is right, we have to recut it all. and then we'll you know. So, he would give me a reel to cut and then and if Richard had finished the reel I would watch that. But it wouldn't let me look at anything that hadn't been recut so every time I grabbed a new reel to start work on. I would watch it and think Oh my God this is so Good. I mean there is so much stuff and you know there is so much great so many great scene in every reel. It was sort of revealed to me over the course of many weeks. Cuz so many things. A reel was finished my work on it. So I didn't get to see the whole movie until we got it all recut from beginning to end and then we kept working on it even then. We kept refining and refining and refining all the way to the last minute. BW : Yeah Paul Hirsch : Yeah it was I mean there was no time to look up and think about the larger implications of what we were doing it was just busy busy busy no sleep nose to the grind stone. BW : Yeah PH : From morning to night every day. BW : Yeah that's wild. |
Talking Bay 94 - Episode 37 - Paul Hirsch
| |||
|
Brandon Wainerdi : What was the, do you remember what the final shot that you locked before shipping off the final cut of the movie was? Paul Hirsch : No I don't. I can tell you a little, I don't know if this is too wonkish for your audience but I can tell you a story that's not in the book. BH : I would love to hear it. Paul Hirsch : George was shooting the visual effect in VistaVision. (Figure 1.) VistaVision is a larger format. It has eight perfs instead of four. (Figure 2.) The idea was when you make dupe negatives from original negative you loose quality. And the idea of shooting the (special) effects in VistaVision was that when you made the dupe negative the optical negative down to four perfs It would intercut better with the original negative. That had been in the camera in the rest of the shooting. You know the live action shooting. |
| |||
|
Paul Hirsch : But it wasn't clear if the quality would match so in order to give himself flexibility, George decided that he would cut the negative in 'A' and 'B' rolls. 'A' and 'B' rolls, was like a checker board (Figure 3) they'd make and 'A' roll and a 'B' rolls and the first shot of the negative would be cut into the 'A' roll. The second shot of the sequence would be cut into the 'B' roll and opposite the 'B' roll and the 'A' roll would be black leader. So every shot was connected to black leader on both sides. There was no shot spliced to another piece of film. It was just to another, you know, another cut of the action. So every piece of action was spliced to black leader on either side. And the reason he did that was that if there was a shot that looked too good, cus the higher quality of VistaVision. He could take it out of the Reel out of the 'A' roll or 'B' roll whichever roll it happened to be in, take it out of the roll. Make another dupe, degrading the quality further so that it would match the original negative. Note: Side reading on Star Wars' negative http://www.theasc.com/magazine/starwars/articles/sped/ssws/pg1.htm https://originaltrilogy.com/topic/Theory-on-the-1997-restoration/id/13459/page/1
If a print is required then the negative will be cut int he format known as an A and B roll. The principal of A and B roll neg. cutting is that you put all the odd shot numbers on one roll of film with black spacing between each shot. You then make up another roll of film with all the even numbered shots on it, again with black spacing in between. On both rolls you make the spacing the sme length as the missing shot which is on the other roll.
|
Figure 3. - 'A' & 'B' Rolls of the Conforming Negative
Figure 3a. - 'A' & 'B' Rolls (from ASC)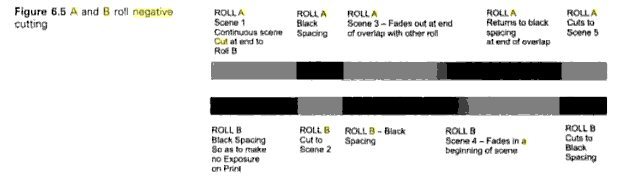
| |||
|
Paul Hirsch : Ok so the reason that we didn't just cut the negative ordinarily which is a single strand of one shot after another was to avoid making what they called 'splice over splices'. Negative cutters can open up spices and splice over them, but it's not desirable. Because the splices are not necessarily as solid as. the purpose of this exercise, the 'A' and 'B' rolls was to avoid making any splice over splices. If we had to take a shot out of the roll, dupe it and replace it with the lower quality dupe, Additional Information: https://en.wikipedia.org/wiki/Film_splicer refer to Cement Splicers | ||||
|
Paul Hirsch : So our negative cutter in assembling these 'A' and 'B' rolls made two mistakes. One mistake was he used the wrong kind of black leader. There are two kinds of black leader there is positive and there is negative black leader. They are both black but the perforations on positive black leader are kind of rectangular and the ones on negative black leader are more oval and they fit more snuggly against the sprockets. For tighter and more secure control cus negative you don't want it to rattle around. |
| |||
|
Paul Hirsch : But he used the wrong kind, so in order to avoid making any splice over splices, it turned out that what had because of his mistake we had to make a splice over splice on every single shot in the reel. BW : Laugh Possible Examples of Splice Over Splice Edits Figure 6a. - Edit Type - "Cut-Dot" from RR-0001 Shot 0143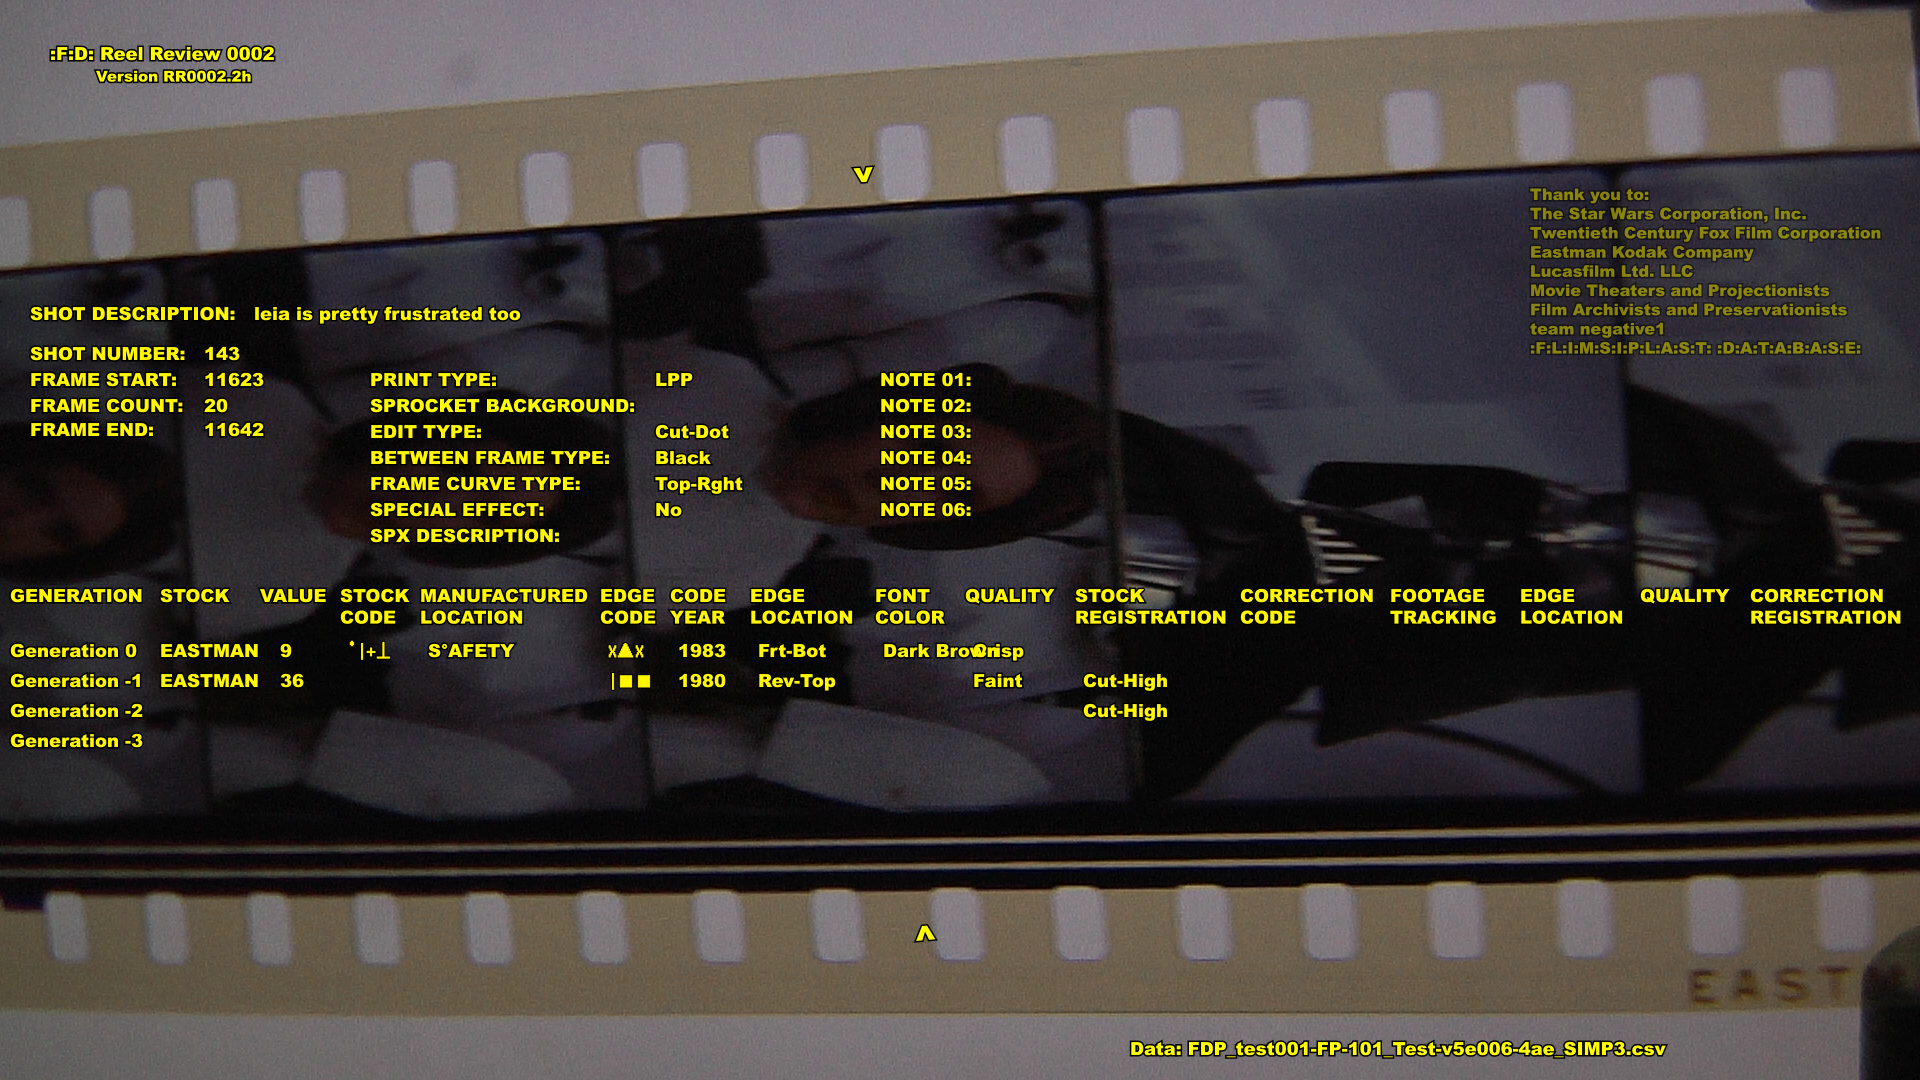
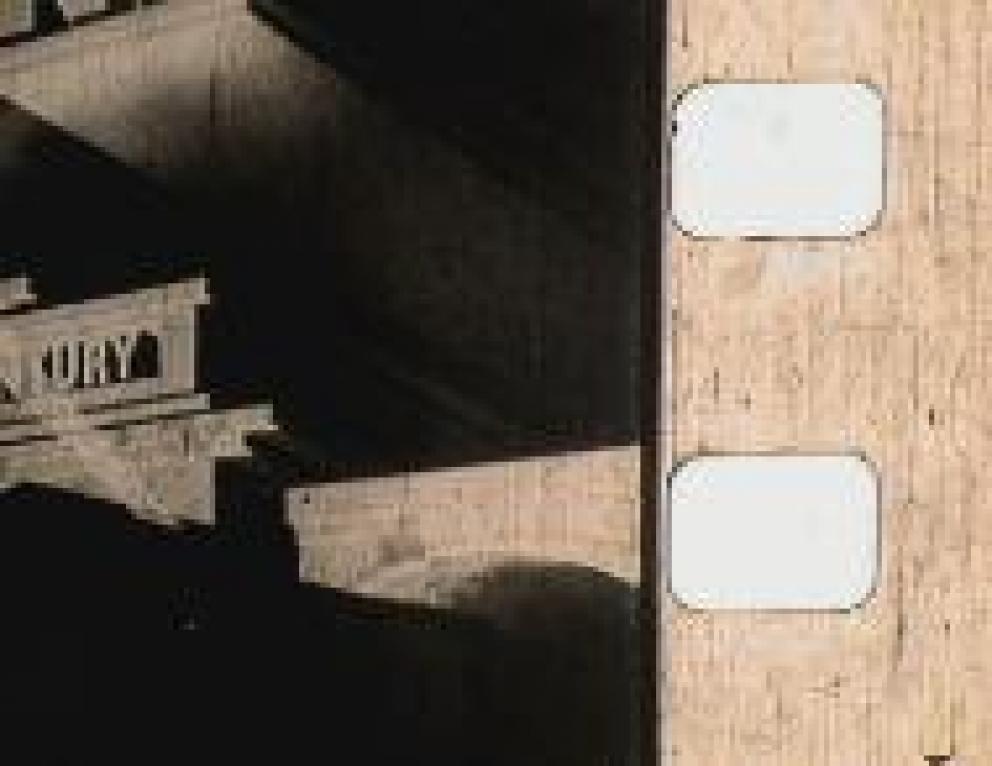
The 'Reel Review' process identified this Edit Type as "Cut-Dot". "Cut" meaning the lower bottom of the previous shot was spliced so that part of the current shot can be seen below the last of the previous shot. In the example above on the Left/Bottom you can see the white of the Leia/Stormtrooper shot in the lower part of the Dark Vader shot. This example also is on an angle. The "Dot" part of the Edit Type terminology can't be seen in this scan. [See below example from RR-0010.] In this Leia first frame there can be seen at the edit a row of dots just below the top of the picture. My guess is they came from the cutting device. Maybe when the steel cutter was pushed down a metal edge left the row of dots.
Figure 6b. - Edit Type - "Wide-Orange" from RR-0001 Shot 0167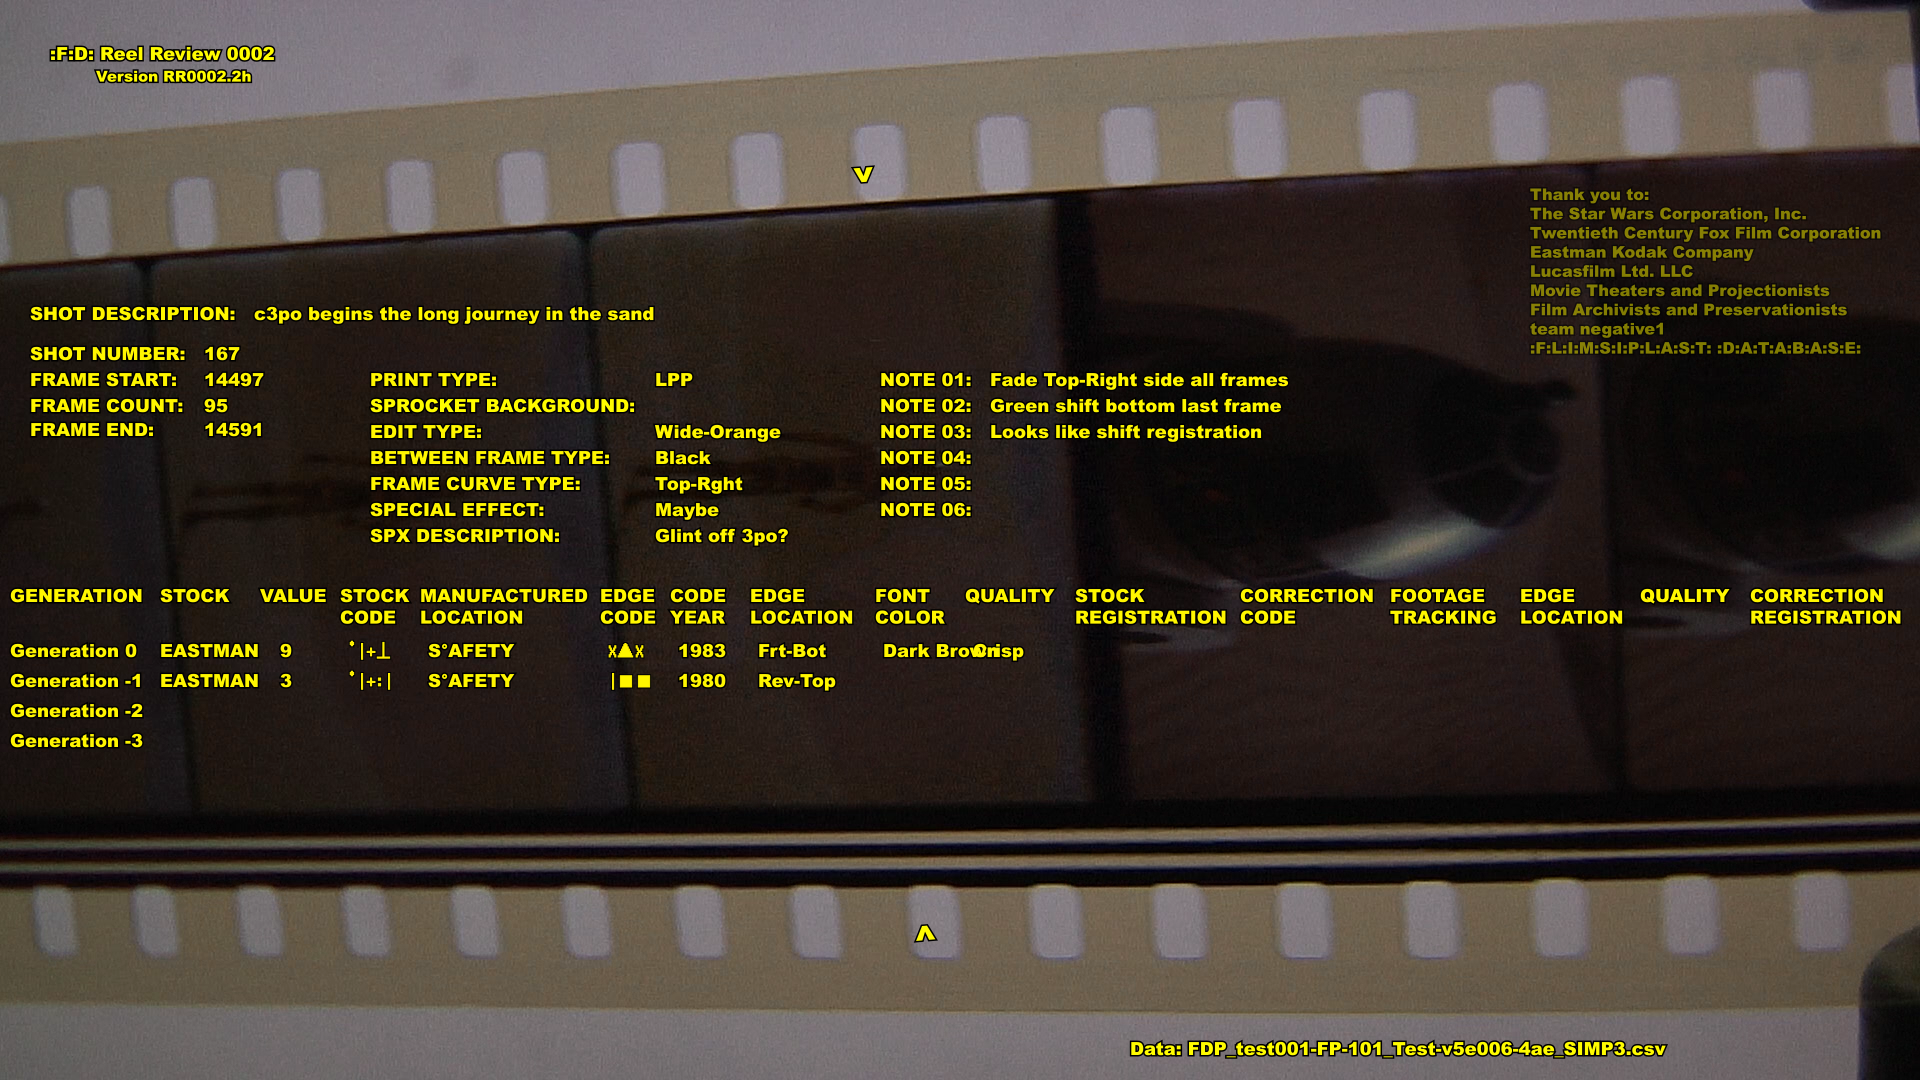
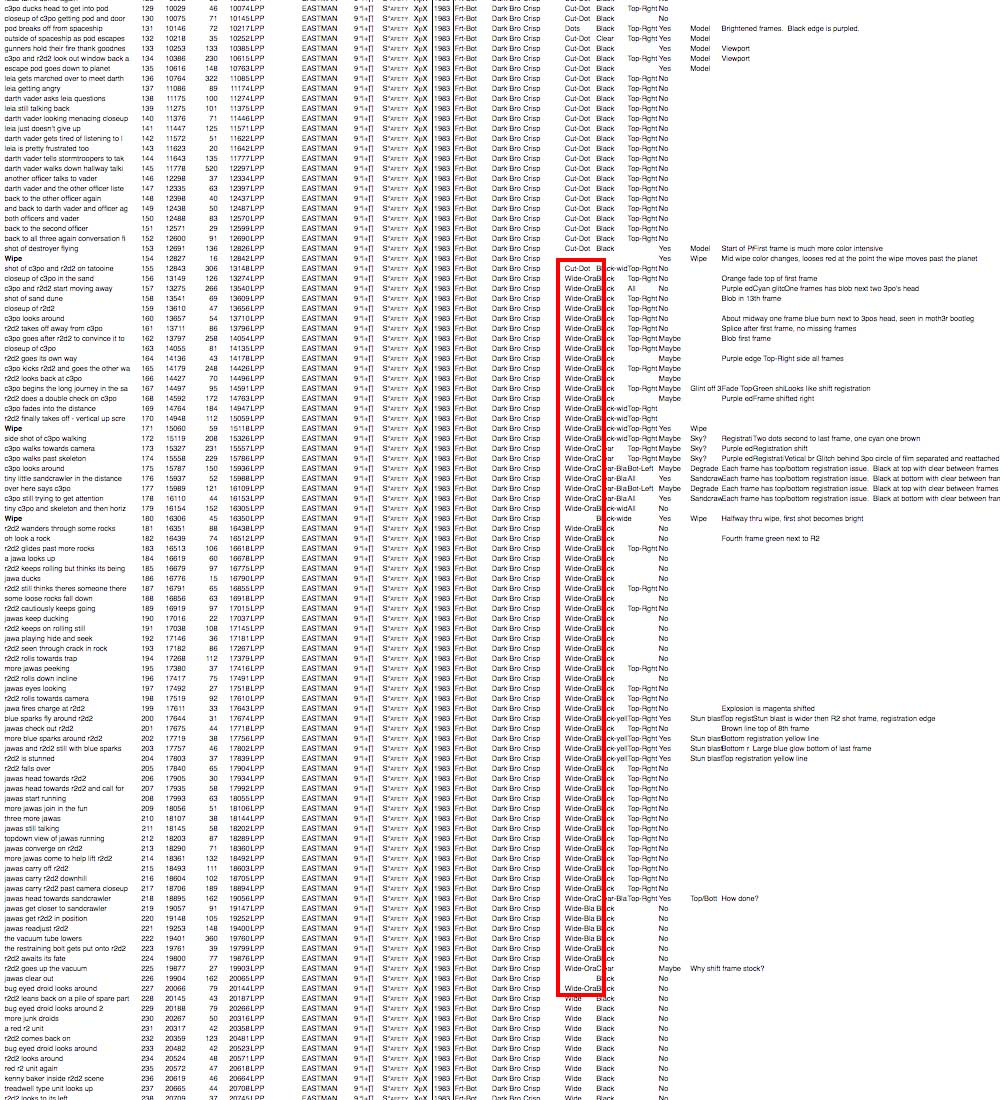
This "Wide-Orange" edit type is probably the type Paul Hirsch was referring to when he mentioned that some of the edits were showing up when projected. The bottom edge has an orange glow to it and is probably a sign of it coming from a certain stage of reproduction, but i'm not certain which. Let us know your thoughts. The Wide-Orange Edit Type can be found at every shot edit for the sequence of C-3po and R2-D2 going their own ways after crash landing on Tatooine. RR-0001 Shots 0156 thru 0227 Ending around when R2 turns back on in the Jawa Sand Crawler, but they return shortly after and are consistent until the end of the Reel. [Note: a screen shot of the spreadsheet identifying the location of this edit type will be at the end of the webpage.] |
| |||
|
Paul Hirsch : His second mistake was there are two kinds of splicers for 35mm film. One was for ordinary 35mm and the other was for you know cinema scope or wide screen where the overlap of one film one piece of film to the other is narrower than on an ordinary 35mm. So that the splice when it comes up, when it is projected it is invisible because it is narrow. We he used the other kind of splicer that that when they splice it's broader. So after he had done his re-splicing with the correct negative and they projected it. You could see every splice as it went through. Then they had to print reel one with a matte that would mask these you know the splices that were visible because he had used the wrong kind of splicer. So if you were to measure it, I suppose the vertical height of each frame in Reel 1 would be less than all the other Reels in the movie. But not noticeably obviously. Brandon Wainerdi : Right, ha ha. After 40 years, no one has picked up on it. Edit Types and their impact on the Visible Frame Using the Chewie roaring shot during the trash compactor scene. Figure 7. shows the full frame and comparisons to several of the latest iterations of the film from official Lucasfilm sources. To hide the 'Dots' of the edit the frame is cropped close to the top of Chewie's head. At the bottom of the shot is a similar unwanted effect. (removed for the 2019 release) There was a red flare/shift which emerged for parts of the shot, maybe from on-set lighting pointing at the camera. |
Figure 7. - Edit Type : Impact to Extents of Visible Frame [click for full size]
|


Return to: Reel Review Introduction Reel Review Media Reel Review Features